WI-FI adapter for Philips TV: models, connection. Why Smart TV does not work on my Philips TV Connecting my Philips TV to the Internet via wifi
There are 10 main ways to restore WiFi to work on modern TVs. Most of them are related to correcting wireless settings. The required settings on Samsung, LG, Panasonic and Sony devices can be changed at home without contacting service center.
Let's take a look at all the main ways to fix configuration errors in turn:
1. Reboot TV and router
The first steps to take if WiFi is not working on the TV is to reboot the Smart TV and the router. The malfunction can be programmatic and can be easily corrected by reinitializing the device drivers. To restart the TV, turn it off and on again. Some experts also recommend removing the plug from the electrical outlet and then plugging it back in. This advice makes sense for TVs that remain connected to local network even after the screen turns off.
During the reboot of the router, you must wait 10-20 seconds between turning off and turning on. During this time, the previous Internet session will be closed on the provider's side. Therefore, the connection will be made anew, with the settings reset to zero. When Smart TV and router turn on again, try to connect WiFi.
2. Manual specification of connection data
Using the built-in Smart TV menu, navigate to the WiFi connection options. Select the manual mode for specifying settings if the DHCP server is disabled on the router, and the connection with automatic parameter detection does not work. In the "IP address" line, enter any IP from the local range. Valid start and end addresses are available for clarification in the admin panel of the router.
In the "Subnet mask" field, you must specify which part of the IP range will be used to address clients on the local network. The common value for this parameter is 255.255.255.0. In the "Gateway" line, enter the IP address of the router, which is used to enter the settings.

Advice! The subnet mask and gateway can also be checked through any computer connected to your router. To do this, select Command Prompt from the context menu of the Start button. In the window that opens, enter the command: "ipconfig / all" and press "Enter".
3. Troubleshooting DNS Server Errors
This method is especially relevant for Samsung TVs. Accessing the Internet and multimedia content through the Smart Hub becomes difficult when Samsung's servers are overloaded. When specifying your DNS server addresses, the connection to Internet resources will be made directly, without using the manufacturer's infrastructure.
DNS server addresses are specified in the provider's support. You can also use the free public DNS. This service is provided by Google, Yandex, OpenDNS. For example, to use Google's address servers, it is enough to enter the IP of the main server: 8.8.8.8 and the additional one: 8.8.4.4. If there is no text field for entering an alternate server, enter only the first address in the DNS settings.
4. Using a different WiFi connection method
If you established the connection by manually entering the password from the wireless network, try connecting via WPS. WiFi Protected Setup technology allows you to activate the fast connection mode in the TV settings. After that, a similar mode must be activated on the router. This is done through the control panel or a dedicated button on the back of the case.

To access the router's web interface, turn the device over and find the login sticker. It is usually located on the bottom side and indicates the standard IP address, username and password. Enter the IP in any browser and enter the account information available on the sticker. Then go to the "WPS" section and activate this function. The fast connection will be available within 1-2 minutes.
In the case when the WPS protocol was used initially, but at the moment the connection cannot be established, enter the information manually. When connecting to a hidden network, you will need to specify not only the access key, but also the WiFi name (SSID). TVs with earlier firmware versions do not always support Hidden Network Search. Therefore, before updating the software, it is recommended to remove the hiding of the network name in the router settings.
5. Reset TV settings
A quick way, which in some cases helps to solve problems with WiFi on Smart TVs, is to restore factory settings. Before executing it, it is advisable to rewrite the values of the main parameters not related to the network. After the reset, you can get them back based on the recorded information. Menu path for restoring factory settings on popular TV models:
- Lg: "Settings -> Advanced -> General -> Reset to factory settings."
- Samsung: "Support -> Self-diagnosis -> Reset".
- Panasonic: "Settings -> System menu -> Initial settings".

Note! Factory reset will return more than the default network settings. Picture, sound, power saving and other Smart TV settings will not be saved.
6. Changing the location of the router
Problems with the wireless network on the TV may be due to poor signal reception from the router. If possible, move the router closer to the Smart TV and install it so that there is less interference in the path of radio waves. The main obstacles to signal transmission are walls, furniture and working appliances.
Installing the hotspot on an elevated level will help ensure better WiFi connectivity. For example, you can put the router on top of a cabinet or hang it over a door. If you cannot move the router closer to the TV, connect a more powerful antenna to it. The higher the antenna gain, the better the Smart TV network will work.
7. Finding problems with a WiFi router
If you are having difficulty connecting to a wireless network, the router settings may be incorrect. To change them, go to the control panel. Click the DHCP tab and make sure the DHCP server is enabled and working properly. Disabling it will not automatically assign a local IP address to the TV and other network devices. Normal routing and Internet access will not be possible.

Check the "Security" tab in the router settings. If client MAC filtering is enabled, disable it. On routers ASUS, TP-Link, D-Link, Huawei and some other manufacturers, the MAC address of any device can be entered into “ White list". In the future, connections of devices from this list will not be blocked, so normal WiFi operation on the TV will be restored.
The MAC address of Smart TV is specified in the settings. The exact path differs depending on the brand, on most TVs of popular manufacturers, the necessary information is in the menu:
- Samsung: "Support -> Contact Samsung -> Down arrow -> MAC of the wireless interface".
- Lg: "Settings -> Support -> Product Information".
- Philips: "Installation -> Manually configure the network -> View network settings -> Start".
Important! After adding MAC address of Smart TV to the "white list" or changing other parameters of the router, restart it. To do this, use the menu item "System" or "System Tools". You can also use the power button on the case or temporarily unplug the device from the outlet.
8. Updating the TV's firmware
Smart TV built-in software needs to be updated in a timely manner. Errors can accumulate as you work, making it difficult to connect to the Internet via WiFi. Depending on the TV model, the update can be done in several ways:
- Through a wireless network;
- Using the cable Internet;
- Via an external USB drive (USB flash drive or hard drive).
If WiFi on Smart TV does not work, to download a new version software use the second or third option. Detailed instructions for updating the software are usually posted on the website of the company that released the TV. Possible names for the desired section: Help, Support, or Help Center.
While the utility is running, it is important not to disconnect or de-energize the device. Any interruption may affect the further functionality of the Smart TV. Do not use third-party firmware to avoid loss of warranty service.

9. Replacing the WiFi adapter with an external one
This method will not correct any problems with the internal radio. But if it is because of them that errors occur when connecting, use an external device. The form factor of such a WiFi adapter resembles a regular USB flash drive. Like most other devices, it works when connected to a TV via USB.
On sale there is another type of adapters for receiving WiFi. They have an external multi-directional antenna that provides better signal reception from the router. It is recommended to connect such modules via a USB extension cable, placing them at some distance from the TV. Thanks to this connection, interference from a working Smart TV will be minimized, and the data exchange speed will increase.

Important advice! Before purchasing an external adapter for connecting to a wireless network, check the list of supported devices in the instructions. This information can also be found on the manufacturer's website or in technical support.
Tutorial video: We connect the TV to the WI-FI network
10. Using a cable connection
A breakdown of the radio module in the TV is the main reason why the previous tips may not help solve the problem. If you've tried all of the WiFi troubleshooting solutions, there is most likely a hardware problem. It is recommended to take the device to a service center. Within the warranty period, the WiFi module will be replaced free of charge.
If it is not possible to take the device to a workshop, you can use a cable connection. To do this, plug one end of the power cord into the "LAN" port on the router, and connect the other to the TV. Routers usually have 2-4 Ethernet outputs, you can use any of them to connect a TV.

Read the article for instructions and tips on how to connect your Philips TV to a laptop, wi-fi, smartphones and any other device.
Having bought, I want to try it out. Initially, we connect an antenna to it to set up the display of TV channels. There should be no problems with this case. As a last resort, you can read our separate article on setting up digital TV. But modern LCD TVs are not only geared towards showing TV! How do I connect other devices? Let's find this out.
Now even the cheapest TVs have a fairly large number of connectors. This means that you can connect a camcorder, DVD player, game console and many other devices to them. Also, any Philips TV has at least one USB port. An external drive is connected to it, which probably makes no sense to talk about in all the details. But how to deal with connecting a laptop? Or how to provide the TV with Internet access, which is required for the Smart TV to function? And in favor of which connector should you make your choice when connecting a home theater? All these issues require detailed coverage.
Headphone connection
The easiest way is to connect headphones to any TV. If they are wired, then the 3.5 mm "jack" only needs to be inserted into the corresponding socket. As for the wireless models, they come in two varieties. The first includes headphones for the TV, transmitting a signal on its own radio frequency. These products come with a special base, also called a docking station. It has a wire that connects to a 3.5mm audio jack. Also, the base must be connected to the mains. It is this docking station that transmits the signal through the air, which the headphones themselves pick up. Such a device can be connected to absolutely any Philips TV - as long as it has a 3.5 mm headphone jack.
Everything is much more complicated with the second type of headphones, to which the Bluetooth models belong. It all depends on the capabilities of the TV. Even if you found in technical characteristics the mention of the presence of a built-in Bluetooth module does not mean anything. It is possible that it is only used to connect a wireless mouse and a dedicated remote control. Therefore, first, it is better to read reviews on your own TV or ask a question about compatibility with Bluetooth headphones on the manufacturer's official website.
If you know for sure that such headphones can be connected, then all that remains is to go to the TV menu and find the section with the settings. You should be interested in the subsection "Bluetooth", where you can scan the surrounding area for the presence of wireless devices and connect them. In general, the pairing process is no different from how this thing is implemented on smartphones.
Almost any Philips LCD TV can play movies saved on a USB stick or external hard drive. And some models support DLNA technology, thereby being able to play content from a computer or drive connected to the router. And we must not forget about Smart TV - support for this technology allows you to watch movies online without even downloading them. What to do if the picture quality suits you, but you want to output the sound to the soundbar or speakers? Do modern TVs have such an opportunity? Of course, this can be done. Most often, TV makers do not assume that you will absolutely always use built-in speakers. So how do you connect your home theater to your Philips TV?
On the back of the device, you will find a fairly large number of connectors. The following jacks are used to output sound:
- Optical Output - Ideal for Applications fiber optic cable protected from electromagnetic interference. Sound can be output from this jack in multichannel mode.
- Coaxial output (S / PDIF) - also allows you to output multichannel audio. It is displayed in digital form- its conversion to analog form occurs already on the side of the speakers or soundbar. Unfortunately, the cable used will most likely not be as shielded as possible from electromagnetic interference. However, the vast majority of users do not notice this.
- RCA - red and white jacks for traditional tulips with “OUT” written above. Only stereo sound is transmitted through them, but already in analog form. In this regard, absolutely all speakers, even the cheapest, have appropriate inputs.
- SCART - analog stereo sound is also transmitted via this connector. Additionally, you need an adapter and an RCA cable.
- 3.5mm audio jack is the worst option, usually only used because there are no other jacks for audio output. To use such a connector, you need a 3.5mm-RCA cable. Of course, you won't be able to output 5.1 or 7.1 sound in this way.
Connecting a TV box or game console

Some people who are tech-savvy are thinking about going to Philips TV. Note that this should only be done if the TV itself does not support displaying digital TV. If he understands, then insert the cable of the terrestrial antenna into the TV - it will accurately recognize all the available channels.
If you need to connect a set-top box, then this is usually done using an HDMI cable. One end is inserted into the purchased device, and the other into the TV. Then, using the "Input" button on the remote control, you need to go to the active HDMI-input (do not forget to turn on the set-top box before that). That's all, you will immediately see the image entering the HDMI connector. Further configuration of the set-top box is carried out using the remote control that came with it.
If your TV does not currently have a free HDMI jack, then a splitter can solve the problem. This is a small separator box that can be purchased for 500-700 rubles.
Also, the set-top box can be connected using traditional "tulips". But on high quality images in this case are not worth hoping for. Also, it is through the "component" that old game consoles are usually connected - Dendy, SEGA, PS One or even PS2. If we talk about new game consoles, starting with the PlayStation 3, then an HDMI cable is already used to connect them.
Internet connection
Philips LCD TVs today may have support. This suggests that through such a device, you can watch content located on the vastness of the global web. However, to do this, you need to provide the TV with Internet access, for which the following methods are used:
- Wired connection - when the TV and router are connected with a network cable;
- Wireless connection - when internet traffic is transmitted over a Wi-Fi network.
So, how to connect the Internet to a Philips TV in one way or another? Let's start with the classic wired version, since it is through the cable that the most high-speed data reception is most often possible. This is important when the video looks very high quality.
Instructions
The first thing a TV owner needs to do is get a network cable. You can buy it at any computer supply store. One end of the wire must be inserted into the LAN connector located on the back of the TV, and the other into the same port of the router (usually it is colored yellow). It is not recommended to connect the Internet cable directly, bypassing the router - the TV may simply not understand the type of connection used by your operator.
Now you need to set up Smart TV so that the operating system recognizes the Internet connection. To do this, press the Home button (on Philips remote controls it usually looks like wooden house). Go to the "Settings" section.
In the window that opens, select the "Installation" item, and then click on "Connect to the network". You will now be asked to agree to the offer by clicking the "Connect" button.
You will be taken to a completely new settings window. Here you need to select the item "Wire". This completes the setup process - it is possible that the system will only ask you to press the "OK" button.
If you are thinking about how to connect Wi-Fi to a Philips TV, then instead of the "Wire" item, you must select the "Wireless" item. After that, the setup process will not end, because the TV cannot connect to absolutely any Wi-Fi network around it.
There are two ways to identify your specific home Wi-Fi network. The first is to press the WPS button. After that, the corresponding button must also be pressed on the router. As a result, the two devices will automatically connect, nothing else is required from you. If there is no WPS key on the router (many budget models are deprived of it), then click on the "Scan" button. This will force the TV to scan the surrounding area for Wi-Fi networks, displaying a list of them. After that, you just have to click on the name of your network, and then enter the password. Your further actions are to press the "Finish" and "Next" buttons, after which you can enjoy the Internet access.
Please note that after connecting to the global web, the TV may ask you to update the firmware. Be sure to do this, since the developers could have introduced some new features into their software. Also keep in mind that older Philips LCD TVs may not have built-in Wi-Fi. They require an external adapter, the name of which should be found in the instruction manual.
Connecting a smartphone or tablet

So, let's assume that the TV is connected to the network. But now the user notices that the supplied remote control is not the best way to control the Smart TV function. It's like you switched from a touchscreen "android" to some push-button Nokia N95 - it seems to be also a smartphone, but the choice of any menu item takes much longer. How can you simplify your life? You can buy a special console that has a trackball or gyroscope. But this is too expensive a pleasure, so many people are thinking about how to connect a phone to a Philips TV. In fact, there is nothing difficult about it.
The only condition for a successful connection is that the smartphone and TV are on the same Wi-Fi network. If mobile device is currently transmitting data via 3G or LTE, then forcibly activate the Wi-Fi module by clicking on the corresponding icon in the notification bar.
What else is required to connect a smartphone or tablet? Of course, the official mobile app... It should be the Philips TV Remote program. You can download it not only from Google Play - there is a separate version for iPhone, iPad and iPod Touch. Be sure to install this application on your smartphone, and then launch it.
Please note that Philips TVs released in 2013 need a different program called MyRemote. Unfortunately, it can only be found in the AppStore, while the Android version will have to look for w3bsit3-dns.com or some other sites.
As for the use of the application, in this regard, you will not face any difficulties. First of all, the program will scan the Wi-Fi network for a Philips TV. Then you just need to press your finger on its name. This application turns a smartphone into an analogue of a remote control. The only difference is that the program is much more convenient to use - the selection of many functions is much faster. Also, this application allows you to play on the TV those media files that are stored in the smartphone's memory. Finally, the phone makes it easy to enter text, which is required when typing passwords or elsewhere.
What else can you connect your Philips TV to
Perhaps, you can figure out the connection of other devices without any prompting. For example, an external hard drive or flash drive is connected to a USB port - there is nothing complicated about it. The system will immediately offer to automatically go to the contents of the drive. If this did not happen, then using the "Input" button go to the "channel" called "USB". Or "USB 1" if there are several built-in connectors. The exact steps depend on the implementation of the particular TV.
As for camcorders, Blu-ray players and other similar devices, they are connected strictly to the HDMI input. Finding the desired "channel" is carried out, again, by pressing the "Input" button. You can connect a laptop to a Philips TV in the same way - the HDMI connector is now present on almost any laptop.
If you want the picture to be displayed only on the TV, then on the computer you need to go to the "Control Panel". Here you need to go to the "Hardware and Sound" section. Depending on the specific version operating system, here you need to look for the item responsible for the method of displaying the image on two screens. Usually it is enough to press the "Turn off the display" button and select the item "Only". Of course, the image will return to the laptop screen when you unplug the HDMI cable.
If you have a lot of different devices that you would like to connect to your TV, then buy yourself an AV receiver. It will greatly simplify this business by offering a huge number of connectors, allowing you to forget about splitters.
Conclusion
Now you know how to connect your Philips TV to certain gadgets, as well as to the Internet. Finally, we will give you a little advice. If the purchased TV supports DLNA technology, then connect the external hard drive to the router. In this case, the TV will definitely recognize the media files contained on the external storage device. Plus, you can view them on your smartphone, tablet or computer.
Is your Philips TV used in splendid isolation or paired with some devices? Was it easy to connect the box to the internet? Share your opinion in the comments.
TV sets Philips can be connected to the Internet, or to a home LAN, you will need a router that supports DHCP (of course, this mode should be enabled before setting up the connection).
Also, the TV can be connected directly to your home computer to view files stored on its hard drives. In this case, it is necessary that the latest version of the media server is installed on the PC, for example, 11 or 12.
Wired connection (LAN)
It must be connected to the TV via the Ethernet connector. To achieve EMC compliance, use Ethernet FTP Cat. 5E.
Before proceeding with the setting of parameters, turn on the router.
Now you can start configuring your TV connection settings. By pressing the button with the image of the house, enter the menu, open the item " Customization"And then select the sub-item" Connecting to the network».
Follow the prompts that appear on the screen. The TV searches for an available network to connect. After that, a window with a license agreement will appear on the screen, with which, after reading it, you must agree by pressing the appropriate button.
Wireless connection (WiFi)
The TVs are capable of connecting to the network via a wireless connection. In order to make such a connection, you will need a PTA01 USB adapter for a TV and a router with WiFi connection support.
Turn on the router, then connect the aforementioned AC adapter to the TV's USB port (located on the side panel). The connection process will start automatically immediately.
Setting in Wi-Fi Protected Setup. (this feature must be supported by the router) is performed as follows:
Press the "WPS" button on the router and wait 2 minutes for the TV to connect to the network.
After two minutes, open the TV menu and select "Easy access", then confirm the action by pressing the "OK" button.
If you need to enter a PIN-code, select "PIN-code" -> "OK". On the screen you will see a PIN-code that must be entered into the settings of the router.
If it becomes necessary to manually enter the security key, select “Set. user " -> "OK" and enter the key using the TV remote control.
After completing all these steps, the TV connection to the network is complete.
If several routers are used, then you can choose one of them. To do this, you must select "Scan." -> "Easy access."
Do I need to buy a dedicated WI-FI adapter for my Philips TV? It is necessary if the model of the device of this brand is equipped with the ability to activate Smart TV, but does not have a built-in device for connecting to a wireless network. In fact, the situation when a TV receiver has Smart TV technology in the list of additional features, but is not equipped with a built-in Wi-Fi signal converter, occurs quite often.
In this case, you will either have to connect the device to the Internet via a cable, which is not very convenient, or purchase a special adapter that will allow you to connect the TV to WI-FI network... But first things first.
What is WI-FI adapter
A WI-FI adapter is a special device that allows you to connect a wireless Internet connection to the device. It acts as an intermediary, which receives the signal, converts it, and then transmits it to the device to which it is connected.
In addition to receiving and transmitting a WI-FI signal, such devices are able to significantly expand the functions of devices, in this case, a TV, by activating the capabilities of a smart TV.
The advantages of using removable Wi-Fi converters for TV receivers are as follows:
- fast connection;
- no need for additional cable laying;
- high speed of reception / transmission of a signal;
- ease of use;
- compact dimensions.
Disadvantages include waste Money for the purchase of additional equipment. Devices such as removable USB converters for TVs are often quite expensive. And the main inconvenience is that television receivers are not able to recognize conventional universal devices that are used for computers, tablets or laptops. For each device - a representative of a brand of one or another manufacturer, only an adapter of the same brand is suitable and no more. So, for Philips TVs, there are two models of network converters, the characteristics and capabilities of which will be discussed below.
Phillips Wi-Fi Receiver Models
For television receivers of the Phillips brand, the manufacturer provides two models of adapters - PTA128 / 00, PTA01 / 00. The Wi-Fi adapter for Philips TV is installed via a USB port on the side of the device. An important point is that these converters are not suitable for all Phillips TV models. You can get acquainted with the list of device models that are able to recognize and support the connection of PTA01 and PTA128 on the official website of the manufacturer.
Model PTA128 / 00 is:
- high connection speed;
- the ability to install a special plug and play program;
- increased range due to the double antenna.
Model PTA01 / 00 is another representative of Phillips converters. The model has become widespread among users, although it is more expensive compared to the previous representative. By using PTA01, the user gets:
- high speed connection;
- data protection using WPA2 encryption;
- plug and play installation.
The capabilities of Smart TV when connected to Wi-Fi converters include:
- control of TV and Smart TV using a tablet, phone or keyboard;
- viewing photos, films;
- audio playback;
- watching programs at a convenient time even after being broadcast;
- a large number of Internet applications.

Connecting and configuring Phillips adapters
The procedure for connecting the network receivers PTA128 and PTA01 and setting them up is quite simple thanks to the intuitive interface of the TV receivers of this brand. Consider the sequence of actions when connecting the converter to the device:
- Find the USB connector on the panel of the device. Most often, this connector is located on the side of the TV case.
- Insert the adapter into the socket. If necessary, you can additionally use a USB cable.
- After the device is connected, the program will start to install and configure the wireless network for the device.
- After starting the program, the screen will display step-by-step instruction on the wireless setup to follow.
- You can use WPS for installation if your router has one.
- If there is no WPS, the WPA password is used, after entering which the device will connect to the network.
Thus, the process of connecting and configuring the network converter is simple and within the power of any user. Before buying this type of Wi-Fi signal receiver, you need to make sure that your TV model is capable of supporting a wireless connection to the network. Usually you can find such information in the instructions supplied with the device. For such devices, there is also a special type of labeling on the packaging. The Wi-Fi Ready marking indicates that the device does not have a built-in Wi-Fi signal reception, but it is possible to connect additional devices to establish a wireless connection.
If your Philips TV with Smart TV (Android TV) does not have a built-in Wi-Fi adapter for connecting to the Internet via Wi-Fi, then the TV can be connected to the Internet using a network cable. Of course, you can buy an external, branded adapter for your Philips TV, and then you can connect to the router wirelessly.
But, if the router is not far from the TV, if it is not difficult to lay a network cable, then you can easily connect the TV to the router using a LAN cable. By the way, such a cable should be included with the router. True, it is usually short there. If you need a long network cable, you can buy one. Usually, in stores that sell computers, they can easily crimp the cable to the length you need.
If you can't pull the cable from the router, then see if your Philips TV can support Wi-Fi connection. I wrote about it in this article.
Alternatively, if you have an extra Wi-Fi router, then it can be, or in. Place it near the TV, and connect them with a network cable. The router will receive Wi-Fi internet from your main router, and transmit it via cable to your Philips TV.
You can connect the cable from the Internet provider directly to the TV. And the internet will work. But provided that your provider uses the Dynamic IP connection technology. If you have PPPoE, L2TP, PPTP, then the TV will not be able to pick up such a connection. You will need a router.
Connect your Philips TV to a router using a cable
Take a network cable. Connect one end on the router to the LAN connector, and the other to the network connector on your TV. On my Philips 43PUS7150 / 12 TV, the network connector is signed as Network.

We just connect the router to the TV.

On the remote remote control click on the button "Home" to open Smart TV, and scroll to the very bottom, there will be Settings. Please select Wired and wireless networks.
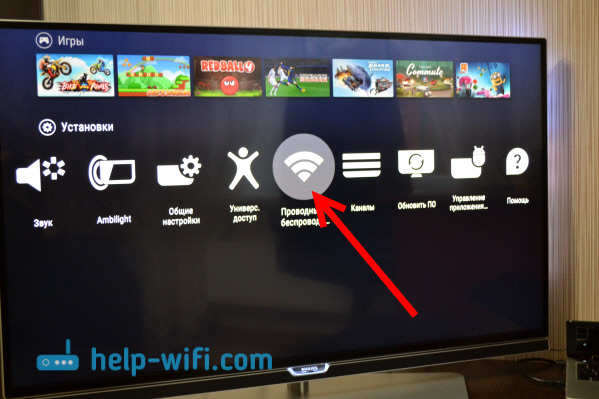
Selecting an item Wired or Wi-Fi, and press the arrow to the right.


Selecting an item Wired.

The TV will establish a connection to the router. If everything connects, just select To complete.

That's all. The TV is connected to the Internet. You can watch online movies, set up watching movies from your computer, open websites in a browser, install programs and games on Android TV, etc.
If the TV does not connect to the Internet, then check if the network cable is well connected. Also, check if the router is working. You can connect the Internet to a computer, for example, to make sure everything works.


