Painting of wooden toys. The technique of painting on wood and its features Painting on children's wooden toys and its meaning
4311 (33 per week) / 03/04/16 10:00 /
These dolls came to us from Germany and for a long time were considered the lot of the poor who do not have enough money for normal toys. However, today, blanks for peg dolls are very popular, since allow you to create very interesting designer toys for children with your own hands, and this master class is devoted to working with these blanks and creating unique dolls.
Materials for work:
- Wooden blanks for Peg dolls;
- Palette for mixing shades;
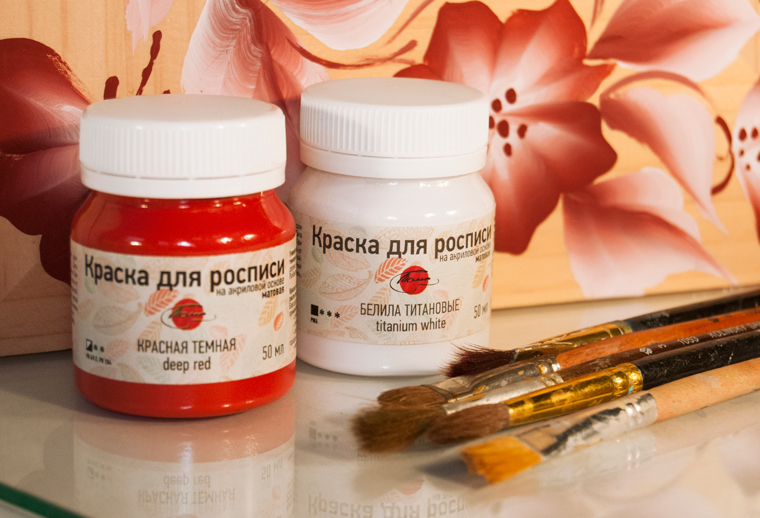
- Acrylic paints of various colors (it doesn't matter if they are in tubes or in jars);
- Waterproof varnish (you can use acrylic or parquet, but not oil, but water-based varnish is safest);
- Sandpaper (just in case);
- Simple pencil;
- Soft brushes in different sizes;
- PVA glue;
- Plain water;
As a rule, the surface of wooden blanks is already polished without any chips and cracks, but you it is worth carefully examining the future toy, to determine the flaws in advance, if any. Small cracks, chips or irregularities can be eliminated using ordinary sandpaper. We simply process the surface first with coarse sandpaper, then with a finer one, until the surface becomes more uniform and smooth.

When the workpiece is perfect, it is necessary to prepare a solution of PVA glue. To do this, mix it with ordinary water in the proportions 3 to 1... This will protect the wood and prevent the paint from absorbing further into the material and spreading during the painting process.
We cover the workpiece with this solution at least three times, letting each layer dry completely. It will take a long time, but the results will be worth the effort.
By the way, instead of PVA solution, you can also use starch jelly. In this case, the consistency of the finished substance should be thick enough, but without lumps. Also 2-3 layers are enough to prevent the paint from penetrating into the wood structure.


After the third layer has dried, we begin to draw the doll's face. We have some examples of how you can paint a doll's face. The main thing is that the initial sketch is done using an ordinary simple pencil (preferably soft so that when drawing lines it does not scratch the layer of the dried base), and if you don’t like something, all this can be easily removed with a regular eraser.

And after the final touch of your sketch, the fun begins - we begin to paint using brushes of different sizes. It is very convenient to use a palette for working with paints, which can be an ordinary plastic cutting board, cells for eggs or sweets, as well as small plastic lids. In such containers, the paint will not spread, and on a plastic board it will be possible to mix different colors with each other in order to get the desired shades that are not in the package.
Many parents find themselves in a situation where their tired child begins to act up, throw things, fight, and is about to go hysterical. That ...
It is necessary to paint, starting with the largest elements, smoothly moving to smaller details. The final touch is the application of a dark outline that will separate the colors and details from each other, as well as hide some flaws that will definitely be allowed when painting.
Be sure to let the paint dry, and in order to avoid trouble, it is better to leave it alone for at least a day.
After that, the toy can be coated with the selected varnish and left to dry for another day to finally make sure that the toy is ready for testing in children's hands.


Elena Ivanova
If the coming year wooden horse then we will decorate the Christmas tree with wooden toys!
This year, we have already tried the decoupage technique with the kids (we made hearts for mothers, everyone liked it very much, got used to an unusual kind of creativity a little. Whoever tried to work in this technique knows how capricious a wet napkin is, wrinkles and tears easily. I'll tell you now, how I do decoupage with preschoolers and even with children with cerebral palsy with poor hand motor skills.
We take wooden blank and primed for decoupage with white paint, I use acrylic (so that in case of failure, you can easily redo it).

The guys and I do several at once toys, because each stage requires drying, and time is precious to us).

Select the pattern you like on napkins and cut it out. Remove extra layers if the napkin is 2 or 3 layers. Place the cut-out picture face down on a transparent film. (for example a file) and spray with water from a spray bottle.

If wrinkles appear on the napkin when it gets wet, gently spread it out on film(it is better to do it for an adult)... Lubricate the surface of the workpiece with PVA glue diluted with water. Turn over the film with a picture and put it on a toy... Carefully iron through the film with your fingers from the middle to the edges, expel air bubbles.

If the picture is crooked or a wrinkle has formed, you can remove the film with a napkin and repeat the operation with the same picture)
Now we remove the film and be sure to coat the picture on top with PVA glue diluted with water.
After dry decorate edge paint with a foam sponge.

We cover with acrylic varnish.
Everything our toys are decorated on both sides, so we did this work for several days. Here's what we have happened:


And we painted wooden figurines.
Archaeologists find samples of Russian wooden toys in the territories of ancient settlements and in burial grounds. Much has already been said about the fact that the toy accompanied a person almost always.
, CC BY-SA 3.0At first, these were simple dolls, often simply chopped with an ax. There are versions that many of these "bony and punk" served as idols, took part in rituals, were amulets. Most likely it was, but there is no one to ask ...
The craft of woodworking was gradually improved, toys were modified and complicated. There was a demand for them, these were no longer hastily carved “bunks for a son” in the workshop, the craftsmen tried to create something new, their own, and then carried them to the bazaars, where wooden toys were successfully sold.
 Guide to Russian Crafts, CC BY-SA 3.0
 So it was in Sergiev Posad, where at first the toys were carved by monks, and then the city near Moscow became a center for the production of wooden toys. Many of the now well-known directions of Russian wooden craft toys originated from the samples of these toys.
In the section "Wooden toys" you can read interesting stories about the history of origin, development, and sometimes the revival of crafts, where the main skill is making toys out of wood.
 Painting wooden toys is a traditional Russian occupation. Initially, in Russia, only things that were necessary in life were made from wood: military instruments, a bow or a sword, musical instruments, whistles, pipes, flutes, as well as dishes. Later they began to make children's toys in the form of horses, birds, dolls, nesting dolls. The manufacturing centers were Gorodets, Semenov, Lyskovo, Purekh, Fedoseevo.
 Description
Painting wooden toys is a traditional Russian occupation. Initially, in Russia, only things that were necessary in life were made from wood: military instruments, a bow or a sword, musical instruments, whistles, pipes, flutes, as well as dishes. Later they began to make children's toys in the form of horses, birds, dolls, nesting dolls. The manufacturing centers were Gorodets, Semenov, Lyskovo, Purekh, Fedoseevo.
In the theoretical part, the master will tell in detail the history of the Russian wooden toy. He will also show the types of painting and their features. After all, wooden toys can be painted with paints, decorated with patterns using stencils or decorated using the decoupage technique.
In the practical part, the participants will go through all the stages of preparation and painting of a wooden toy. As a result, everyone will receive a bright toy that can be kept as a keepsake or as a gift to a friend. After the master class, everyone will have a file with full instructions on painting wooden toys, personal skills and abilities. Perhaps some of the participants will like this lesson, and he will acquire a new hobby, which may develop into a vocation. After all toys self made will always be in fashion!
Wood painting is considered one of the oldest types of creativity and drawing. This method of decoration was widespread in Russia, with the help of paints they painted wooden boards, decorated panels, trays and boxes. To learn how to decorate wooden objects on your own, you just need to learn the basic painting techniques.
This type of decorative and applied art has been passed down from generation to generation. Adults, together with children, depicted original patterns according to folk motives, which were later framed in frames. Decorating with the help of painting various interior items was considered popular. In this form, this art has come down to this day, when furniture, dishes, toys, musical instruments are decorated with decorative painting on wood.

As a material for the work of the master, coloring compositions for various purposes are used. You can paint on wood with gouache, acrylic, watercolors and even oil. It will not be difficult even for a child to make a beautiful painted board for cutting food on his own: the whole process consists of selecting a picture, transferring it to the surface, and gradual coloring. It is considered important to achieve the correct combination of colors so that the boards look harmonious.
There are three types of painting techniques:
- Khokhloma - characterized by a black background, as well as yellow and red colors, where fancy flowers are depicted.

- - the main motives are drawings dedicated to urban scenes, epics and flower compositions.

- - a type of drawing on wood, the main subjects of which are ornaments and horses.

To learn how to paint on wood, you need to familiarize yourself with the basic techniques, which can be learned about in the following sections.
How to paint a kitchen board with acrylic paints?
The most convenient material for acquaintance with folk art and mastering technology is acrylic paints. They are thick enough and can be mixed to achieve a spectacular image. After painting a wooden board with such paints, it is not necessary to varnish the surface with varnish, because acrylic creates a strong protective film.
To work you will need:
- cutting kitchen board with a smooth surface;
- specified paints of the required colors;
- brushes;
- stencils for painting.
Choose high-quality artistic acrylic paints that have sufficient thickness - this is how the drawing will be saturated.
The surface of the board should be flat, if there are protrusions on it - it is recommended to use sandpaper and sand the plane of the tree... After that, the masters recommend impregnating the base with white acrylic so that the subsequent sketches lie flat on the board. While the workpiece is drying, it is necessary to transfer the drawing to wood, how to do this can be found in the last section of this material.
The peculiarity of the products obtained after painting is that they have a bright and rich color. It is necessary to start painting the board with large elements of the drawing, gradually moving on to smaller details. To select individual details of the image, paint them with a thin brush with black or white.

After painting on wood acrylic paints the product must be thoroughly dried. The next step will be varnishing the board, if further use of the product is expected for its intended purpose. If the finished result performs only a decorative function, then you do not need to varnish the board - painting with acrylic paints will independently stick to the tree.
Video: painting a cutting board with acrylic paints.
Painting a tree with watercolors and its features
The technology of painting wooden bases with watercolors involves the rapid application of paint to the surface. Some argue that watercolor is completely unsuitable for such coatings, because the abundant wetting of the wood leads to its deterioration. It is possible to correct the situation and learn how to correctly paint on wood with watercolors - you just need to choose a competent technique.
For beginners, painting with watercolors should not be a complicated procedure; you can practice on wooden blanks in the form of nesting dolls. After the transfer of the drawing, it is necessary to carry out 1 time with a wet brush over the section of the workpiece that needs to be painted. This is done for better adhesion of the paint. Step by step, first paint large areas, and then add color to the details.

The use of watercolors on wood has a number of features:
- the ability to create light and airy images, equipping them with shadows and color transitions;
- lack of relief of the smear, which cannot be said about painting wooden bases with acrylic or oil paints;
- a face painted on a tree with watercolors most faithfully conveys shades;
- the possibility of mixing watercolors with other types of paints for painting on wood.
The finished product can be coated with clear varnish. Watercolors are also used to decorate the backgrounds on the panel, because this paint is a pigment diluted with water, which is most suitable for large areas.
Gouache for painting as an alternative
A cutting board for the kitchen is one of the most practical everyday items. To make this accessory pleasing to the eye every day, it is recommended to paint it; this can be done with gouache paints on wood. Such a coloring material is similar to acrylic, but it loses a little in saturation.

Painting on wood with gouache consists of the following stages:
- Sanding the board. If the surface of the product was not even enough, it must be polished with sandpaper.
- Protection of the structure. If the board is not varnished, it must be stained.
- Priming. For this, acrylic of any suitable color is used. The wooden board should be carefully covered with paint without gaps. This will facilitate easy and quick coloring.
- Drawing. After translating the image or drawing yourself, you need to start painting on the board. For beginners, it's best to choose simple ornaments or floral motifs. Before painting the wood with gouache, you can add a little PVA glue to the jar for better adhesion.
- Varnishing. After the end of the process, it is recommended to open the product with varnish. You can use any composition that is at home, but odorless acrylic varnish is considered the most suitable.
The master class presented below in the photo is designed for people who do not have the skills to paint kitchen boards. Painting on wood is a pleasure, and the result is a delight for everyone around you.

It is necessary to apply varnish to the finished product in several layers, but after the previous layer has completely dried. The kitchen is a place where moisture is constantly exposed, so this stage is considered mandatory.

Methods for translating a picture into a base
Some lovers of wood painting only with experience begin to independently depict pictures on wood. Beginners cannot do such an activity, so the question arises, what are the ways to translate a picture onto a wooden base? You can learn more about them below:
- Carbon copy. This method is considered the simplest - it requires the presence of an ordinary dark or (in the case of a black base) white carbon copy. The printed sheet is superimposed on a carbon copy, under which a piece of wood is placed. With the help of a pen, the drawing is completely traced along the contour. As a result, an image is formed on the workpiece that can be painted. The resulting painted product is neat.

- Tracing paper. To make the painting have beautiful borders, you can use tracing paper. To do this, it is superimposed on the prepared drawing and traced around it along the contours. Then the sheet is turned over and rubbed abundantly with graphite. After that, tracing paper is applied to the tree and the image is circled with a sharp object. With this method, it is possible to draw even the most complex patterns.

- Soap. The method is similar to the previous one, but it is good when the templates for painting are transferred to a black surface. It is necessary to repeat the same operations, only rub the tracing paper not with graphite, but with soap.
To hone your skills, experts recommend using different techniques for painting on wood. It is also good to paint on a former wooden base under a tray, on a casket or other things. The resulting products can be given as a gift or decorate the house with them.
Wood painting workshops (2 videos)
Different options and ideas (30 photos)


